Pages

Showing posts with label FTP. Show all posts

Wednesday, 30 January 2013

Install FTP for IIS 7.5 on Windows Server 2008 R2

Install FTP for IIS 7.5 on Windows Server 2008 R2

Click Start >> Administrative Tools >> Server Manager. In the Server Manager hierarchy pane expand Roles and then click on Web Server (IIS).
Install FTP for IIS 7.5 : Server Manager Click on Add Role Services which will launch Select Role Services window as shown below. Select FTP Service and FTP Extensibility services from the list. Click Next.
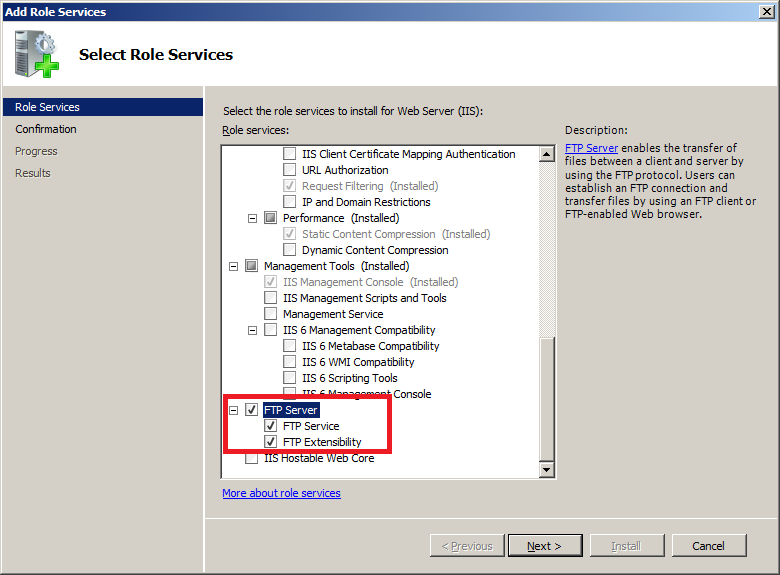
Install FTP for IIS 7.5 : Select Role Services On Confirm Installation Selections page click Install.
Install FTP for IIS 7.5 : Confirm Installation Selections On Installation Results page click Close to exit the Add Role Services wizard.
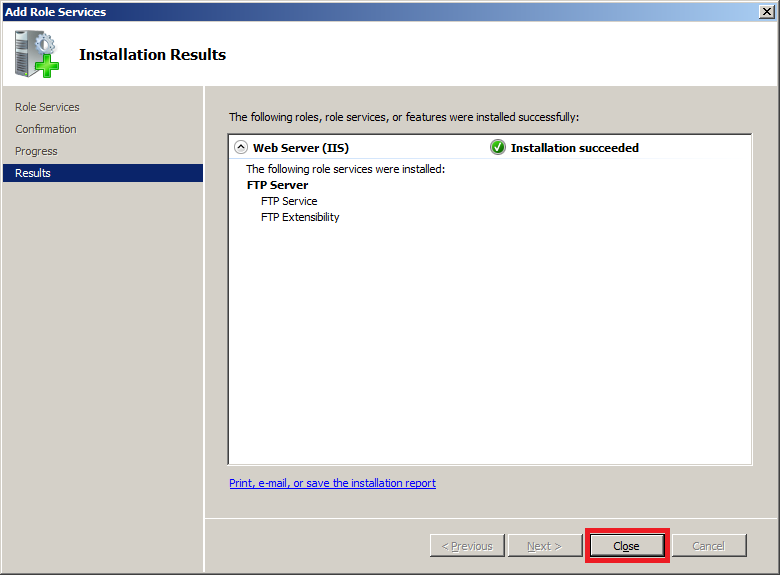
Install FTP for IIS 7.5 : Installation Results

Check Firewall Rules to Allow inbound FTP Traffic

After installation of FTP Server make sure that there are Inbound firewall rules in place to allow inbound FTP traffic. To check this follow below steps:
Click Start >> Administrative Tools >> Windows Firewall with Advanced Security and then click on Inbound Rules and check if three inbound firewall rules exists as highlighted in below snapshot.
  1. FTP Server (FTP Traffic-In): This rule allows inbound traffic on TCP port 21 for FTP Service.
  2. FTP Server Passive (FTP Passive Traffic-In): This rule allows inbound traffic on TCP ports greater than 1023 for FTP Service. This is required for FTP Service to work in passive mode.
  3. FTP Server Secure (FTP SSL Traffic-In): This rule allows inbound traffic on TCP port 990 for FTP Service over SSL.
If these rules doesn’t exists then create them.
Install FTP for IIS 7.5 : Firewall Rules

Create new Ftp site on iis

Using the FTP Site Wizard to Create an FTP site

In this first section we will create a new FTP site that can be opened for Read-only access by anonymous users and Read/Write access by the administrator account.
  1. In IIS Manager, in the Connections pane, click the Sites node in the tree.
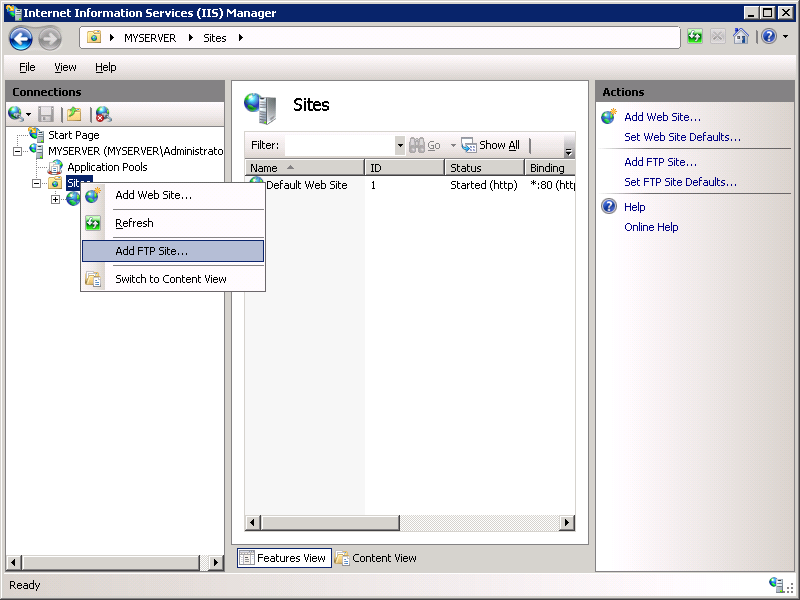
  2. As shown in the image below, right-click the Sites node in the tree and click Add FTP Site, or click Add FTP Site in the Actions pane.
  3. When the Add FTP Site wizard appears:
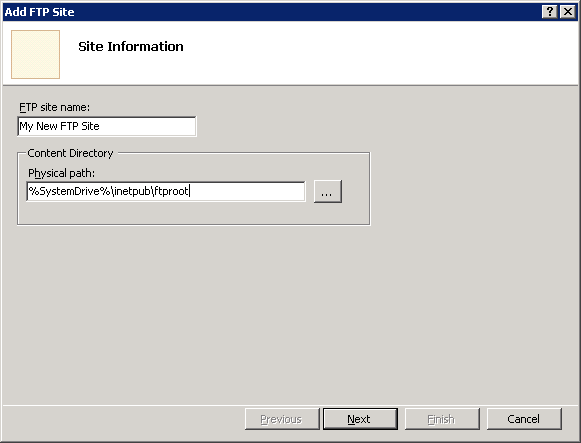
    • Enter "My New FTP Site" in the FTP site name box, then navigate to the "%SystemDrive%\inetpub\ftproot" folder that you created in the Prerequisites section. Note that if you choose to type in the path to your content folder, you can use environment variables in your paths.
    • When you have completed these items, click Next.
  4. On the next page of the wizard:
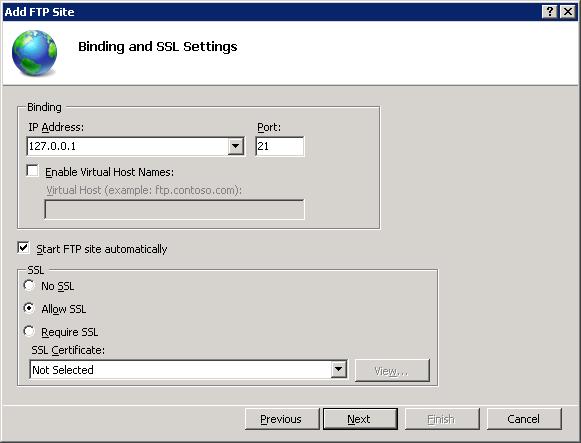
    • You would normally choose an IP address for your FTP site from the IP Address drop-down, or you could choose to accept the default selection of "All Unassigned." Because you will be using the administrator account later in this walk-through, you want to make sure that you restrict access to the server and enter the local loopback IP address for your computer by typing "127.0.0.1" in the IP Address box.
    • You would normally enter the TCP/IP port for the FTP site in the Port box. For this walk-through, you will choose to accept the default port of 21.
    • For this walk- through, you will not use a host name, so make sure that the Virtual Host box is blank.
    • Make sure that the Certificates drop-down is set to "Not Selected" and that the Allow SSL option is selected.
    • When you have completed these items, click Next.
  5. On the next page of the wizard:
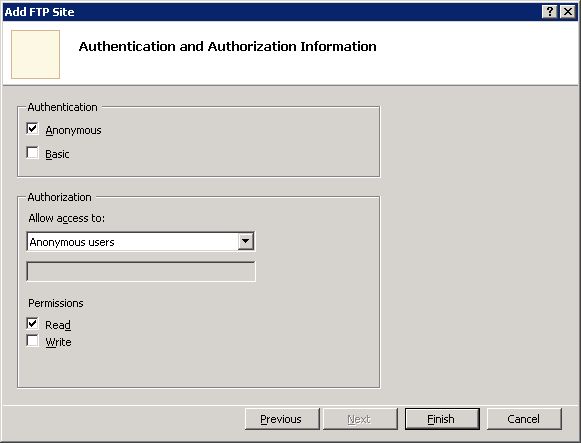
    • Select Anonymous for the Authentication settings.
    • For the Authorization settings, choose "Anonymous users" from the Allow access to drop-down, and select Read for the Permissions option.
    • When you have completed these items, click Finish.
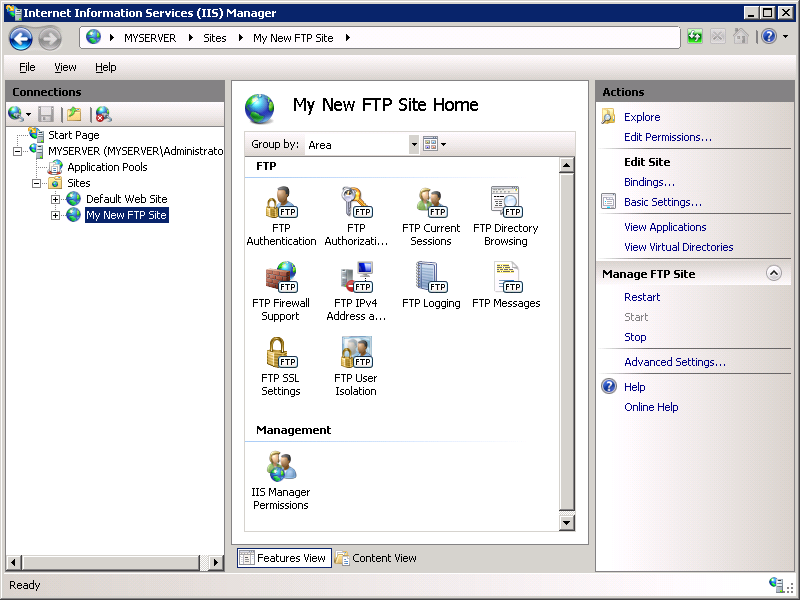
  6. In IIS Manager, click the node for the FTP site that you created; this will display the icons for all of the FTP features.
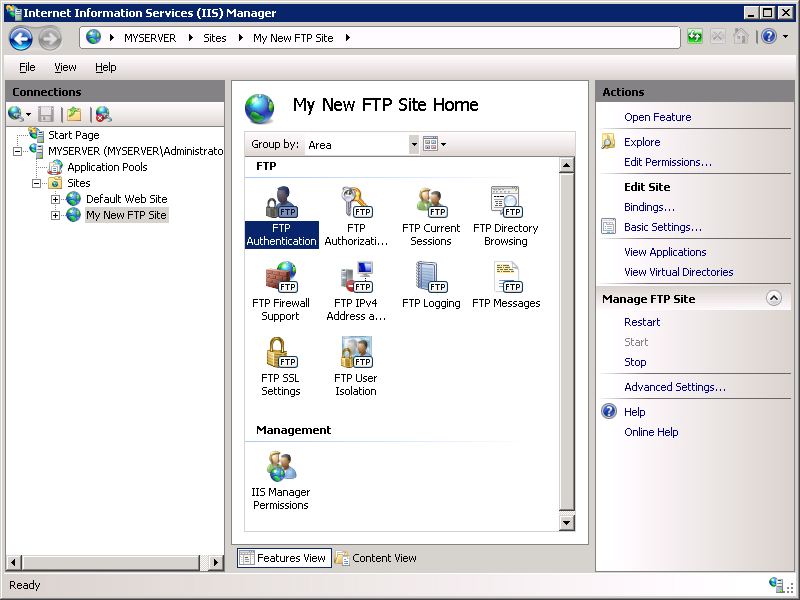
  7. We need to add Basic Authentication so that users can log in. To do so, double-click the FTP Authentication icon to open the FTP authentication feature page.
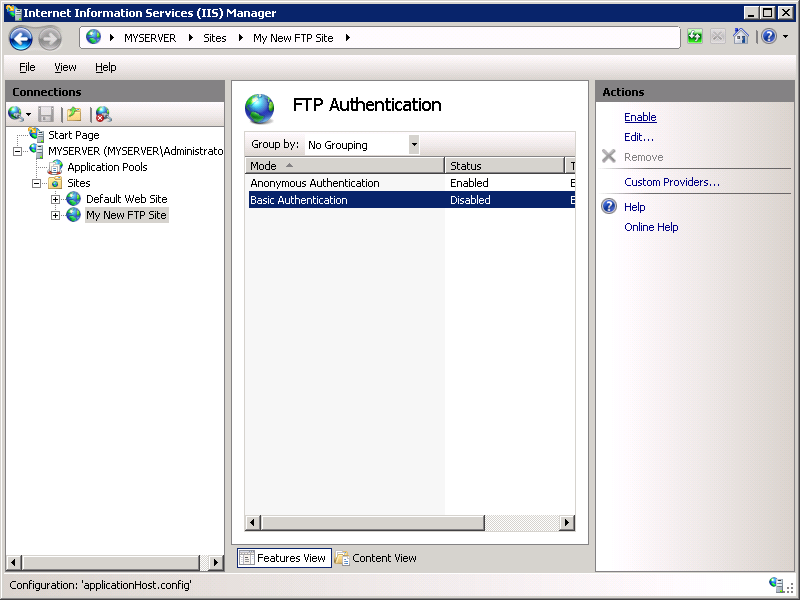
  8. When the FTP Authentication page is displayed, highlight Basic Authentication and then click Enable in the Actions pane.
  9. In IIS Manager, click the node for the FTP site to re-display the icons for all of the FTP features.
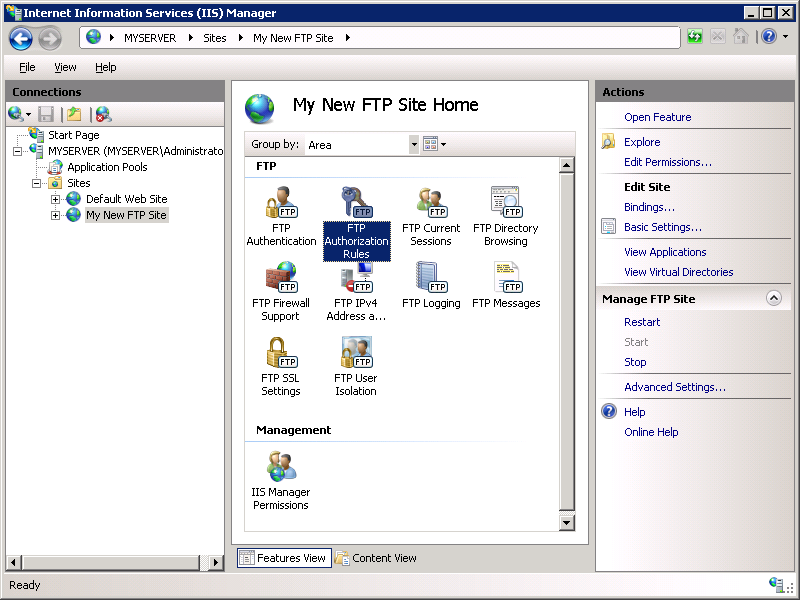
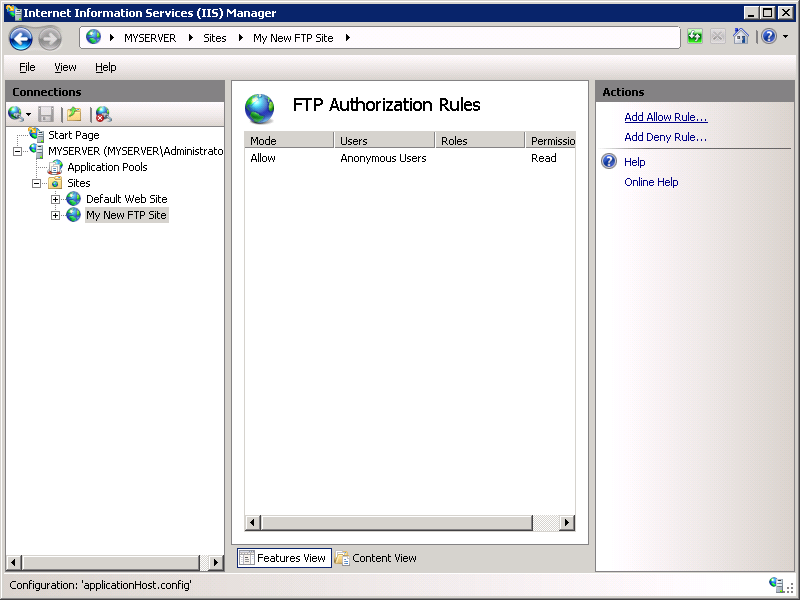
  10. We need to add an authorization rule so that the administrator can log in. To do so, double-click the FTP Authorization Rules icon to open the FTP authorization rules feature page.
  11. When the FTP Authorization Rules page is displayed, click Add Allow Rule in the Actions pane.
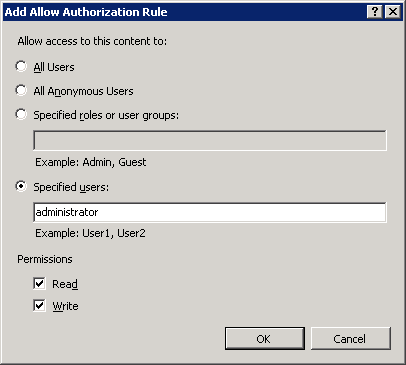
  12. When the Add Allow Authorization Rule dialog box is displayed
    • Select Specified users, then type "administrator" in the box.
    • For Permissions, select both Read and Write.
    • When you have completed these items, click OK.

How To Create FTP Account In Windows Server 2008 R2 (Microsoft FTP Service 7.5)?

Requirements

Windows Server 2008 R2 comes with FTP Publishing Service 7.5. This new FTP service offers Web administrators and hosters an integrated management and configuration experience for FTP and Web sites through IIS Manager.
This step by step guide to show you how to create an FTP account in Windows Server 2008 R2.

Step By Step Guide

1) Create FTP Username

Open Start > Administrative Tools > Server Manager and go to Server Manager > Configuration > Local Users and Groups > Users. Create a new Windows user account that you want to use as FTP username. Usually you can use your domain name.

2) Create FTP Site

2.a Open Start > Administrative Tools >Internet Information Service (IIS) Manager and go to Sites > yoursite.com. Click "Add FTP Publising..." link in the right bottom corner.

2.b Make sure that the Certificates drop-down is set to "Not Selected" and that the Allow SSL option is selected.

2.c Select Basic for the Authentication settings. Choose "Specified users" from the Allow access to drop-down and type the username just created. Select Read and Write for the Permissions option.

2.d You have successfully added FTP publishing to an existing Web site. You can also change the physical path for the FTP Account. Click "Advanced Settings..." link in the right bottom corner. Change the physical path from "C:\Domains\sqlserverhost.net\wwwroot" to "C:\Domains\sqlserverhost.net". So you can access upper level folder.